Free Craft Ideas, Tutorials and Templates


CI Border

Home

Patterns

Tutorials

Spring Crafts

Summer Crafts

Fall Crafts

Christmas & Winter Crafts

New Crafts


Happy New Year Champagne Glass Shaker Card

This card is just bubbling away and is perfect for sending a new year’s wish or to even be used as an invitation to a new year’s eve party. The filling for the shaker card is iridescent flakes which add to the sparkly look of the card. Follow the step-by-step pictures and instructions to find out how to make the shaker effect of the glass.


New Year's Card - Happy New Year 350

For this project you will need:

- 1 blank white card
- pink construction paper
- white fiber paper
- acetate foil
- iridescent flakes
- double sided adhesive tape
- double sided adhesive foam tape
- clear acrylic or glass half beads
- hologram cardstock
- alphabet paper punches
- stick glue
- silver dimensional paint
- jewel glue
- scissors

Craft Pattern:

Craft Template - Coctail Glass

Champagne Glass Template


Instructions:

Shaker Card Tutorial 1
1. Tear a piece of pink colored construction paper out and glue this to your blank white card.
2. Now tear a piece of white fiber paper and glue this in a decorative way over the cardstock.
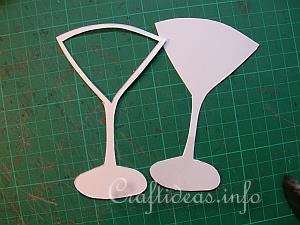
3. Print out the pattern and cut out twice out of white cardstock. On one of the patterns, cut out the inside of the glass so that there is a 1/4 inch or 7mm border.
Shaker Card Tutorial 2
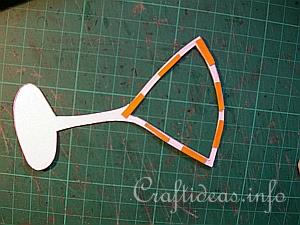
4. On the cut out paper glass place adhesive tape along the edge as seen in the picture below.
Shaker Card Tutorial 3
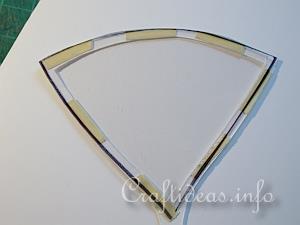
5. Cut a piece of acetate foil to fit the inside of the glass. Remove the protective papers fo the double sided adhesive and adhere the acetate foil cutout to the glass.
Shaker Card Tutorial 4
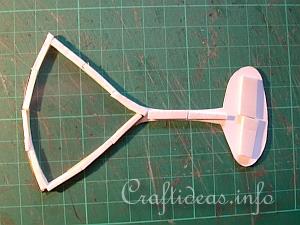
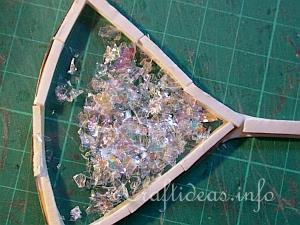
6. Now add double sided foam tape completely along the cut out edge of the glass and along the stem and base.
Shaker Card Tutorial 5
7. Fill in the area with some iridescent flakes and then pull the protective paper off of the foam tape. Adhere the second glass exactly over the first. Add double sided adhesive to the back of the glass and adhere it then on to the card.
8. Use the dimensional paint and draw a fine line around the glass if you like.
9. Adhere the acrylic or glass beads to the card using the jewel glue.

Illustrated Card Craft Tutorials:

Card Help 75

Tips, Tools and Techniques for Card Crafts and Paper Crafts


More Spring Season Craft Themes:

Spring and Easter Paper Crafts

Spring and Easter Wood Crafts

Spring and Easter Textile Crafts

Spring and Easter General Crafts

Spring and Easter Crafts for Kids

Spring Season Greeting Cards

Valentine’s Day Crafts

St. Patrick’s Day Crafts

Easter Crafts

Easter Chick Crafts

Decorating Easter Eggs

Easter Bunny Crafts

Mother’s Day Crafts

Spring Craft Patterns

Nature Crafts

More Cards for Spring Birthdays and Occasions:

Easter Card with Vintage Motifs

Happy Easter Card

Wedding Card or Invitation with Turtledove and Heart

Silver Wedding Anniversary Card

Wedding Place Card

Baby Carriage Card for Births

Birth Announcement for a Baby Girl

New Year’s Card or Invitation

St. Patricks Day Card - Good Luck

Confirmation Card with Dove and Rainbow Motifs

New Year's Card - Happy New Year


Copyright: Please read this Copyright Information about using the images of this website.


© Craftideas.info

Contact     Links     Privacy Policy and Cookies