|
|
|

|
|
|
|
|
|
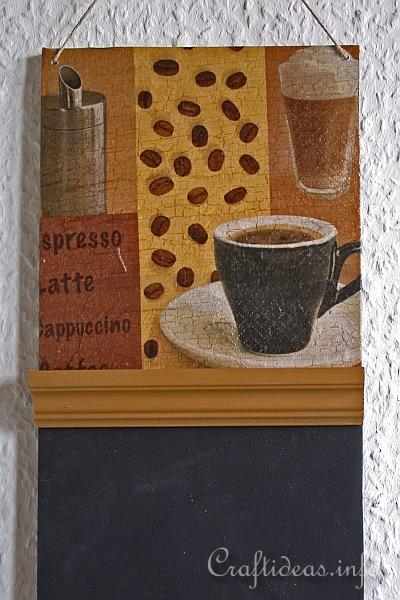
Wooden Coffee Shop Chalkboard
La Dolche Vita! This project was the result of left over wood material and a coffee shop printed paper napkin which inspired the idea. A chalkboard is perfect for the kitchen to write down grocery needs or other reminders. Because of drying time, some patience is required to make this project but it is very easy to complete and you can be finished within a day if it is warm enough for the paints to dry quickly.
|
|
|
|
|
For this project you will need:
- 16 x 50 cm piece of 6mm thick plywood or wood of choice
- 16 cm wide piece of decorative wooden border
- paper napkin with coffee motif
- acrylic paint in dark sand color and beige
- paper napkin applique glue
- masking tape
- cracking medium
- chalkboard paint
- wood glue
- drill with bit for drilling holes to hang
- thin cord for hanging
|
|
|
Instructions:
1. Saw out the wood.
2. Use 1/4 of your paper napkin and remove all but the top layer and lay aside.
3. Use masking tape and section off the top portion of your board where the paper napkin will be. Paint within this area with the darker colored paint and let it dry completely.
4. Now paint over this section with cracking medium and let it again dry completely.
5. Paint over this section with the lighter colored paint. Make sure not to go over your brush strokes more than once as this will ruin the cracking process. Let this section dry completely. You may assist with a hair dryer to decrease the waiting time.
6. Use the paper napkin applique glue to apply the paper napkin over the section. The cracks will show up through the napkin making it look antique.
7. Once completely dry, remove the masking tape and mark off the top section. Now paint the bottom section with chalkboard paint. Once completed and dried, remove the masking tape.
8. Paint the decorative border piece in the darker paint color and let dry.
9. Glue the border piece onto the board where the 2 areas meet and let glue dry.
10. Paint backside of the board with darker paint color.
11. Drill 2 holes at each top corner and insert cording for hanging.
|
|
|
|
|

Close-up of the chalkboard
|
|
|
|
|
|
|
|
|
© Craftideas.info
Contact Links Privacy Policy and Cookies
|
|
|