Free Craft Ideas, Tutorials and Templates


CI Border

Home

Patterns

Tutorials

Spring Crafts

Summer Crafts

Fall Crafts

Christmas & Winter Crafts

New Crafts


Decoupaged Utility Can

If you make a lot of cards or scrapbooking, then you may have a large collection of craft supplies and would like to have it all at your fingertips when crafting. By recycling and decoupaging cans from the kitchen, you can keep the supplies tidy in a decorative way. Here a cute paper napkin was used to pep up ordinary cans and add a cheerful look to them.


Decoupage Pencil Holder

For this project you will need:

- clean can (s) from the kitchen - any size is fine
- white acrylic paint to use as base color under the napkin (you can choose any light color like beige or egg-shell white as well
  if you do not have white)
- paper napkin with design of choice
- soft but flat paint brush
- decoupage glue or paper napkin applique glue

Cute Birds Paper Napkin
Here is the napkin with colorful birds that was used for this project.

Instructions for one can:

1. Basecoat the can with white paint and let it dry.
2. Take your paper napkin and remove the bottom layers so that you only have the top layer.
3. Cut the napkin out to a height slightly higher than the can. Any overlap can be glued over and under the can rim
4. Wrap the napkin around the can to determine how much the napkin overlaps. Cut the napkin down so that it only overlaps about one centimeter. Discard the rest.
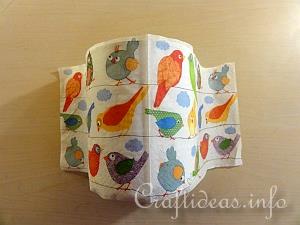
Example of Paper Napkin Decoupage 1
5. Place the paper napkin onto the can so that the center of the napkin is in front of you.
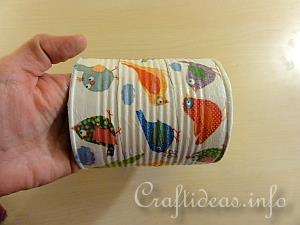
Example of Paper Napkin Decoupage 2
6. To apply the glue, place your left hand (or right hand if you are left handed) inside the can like in the image below. This will make working easier and also prevent that you touch the napkin or wet glue while working. Then brush on a thin layer of glue over the napkin. The glue will saturate through the napkin adhere the napkin onto the can. Start at the middle and work your way outwards in all directions. If your can has grooves, make sure to carefully catch them while brushing the glue onto the can. Gently brush in the direction of the grooves so that the napkin softly falls into place and picks up the groove pattern. Try to avoid wrinkles while “painting”. Smaller wrinkles will also disappear when the glue dries.
7. When the can is completely covered, set aside and let it thoroughly dry.

Illustrated Craft Tutorials:

Paper Napkin Applique

Paper Napkin Decoupage


Decoupage Pencil Holder 2

Decoupage Pencil Holder 3
Cute little birdies add such a happy touch to this can.


A Selection of Summer Crafts

Picture Frame Decorated With Straws

Kitchen Canvas Picture

Sunflower Bookmarker

Antique Flower Pots

Altered Cookie Tin

Beautiful Votive with Glass Nuggets

Decoupage Utility Can

Tealight Lantern for the Summer

Patriotic Mosaic Coaster

Summer Flower Pot

Decoupage Pencil Holder


More Craft Themes:

Summer Crafts for Kids

Summer Paper Crafts

Summer General Crafts

Summer Wood Crafts

Summer Textile Crafts

Birthday and Greeting Cards

Patriotic Crafts

Maritime Crafts

Summer Templates, Patterns and Coloring Book Pages


Copyright: Please read this Copyright Information about using the images of this website.


© Craftideas.info

Contact     Links     Privacy Policy and Cookies