Free Craft Ideas, Tutorials and Templates


CI Border

Home

Patterns

Tutorials

Spring Crafts

Summer Crafts

Fall Crafts

Christmas & Winter Crafts

New Crafts


Reusable Autumn Glass Covers for Tea Lights

Don’t these look so pretty for the autumn season? During the day the leaf motifs fit the season perfectly. In the evening, the soft light shines through the cover and really sets a warm and cozy mood.

This project is frugal because all you need are glass holders for tea lights and you can change the covers for each season or occasion.


Autumn Tea Light Cover

For this project you will need:

- straight glasses or whiskey glasses (these were about 9 cm high)
- paper napkin with autumn motifs such as leaves - it works best to have motifs that are all around the napkin
- a laminating machine > if you do not have a laminating machine, see instructions below at ***
- scissors and ruler
- clear one sided sticky tape no wider than 1 centimeter or 1/4 inch

Instructions:

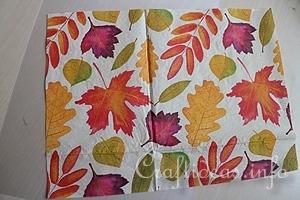
Autumn Glass Cover Tutorial 1
1. This is the napkin that was chosen for this project. The leaves are facing all different directions which makes it ideal for this project.
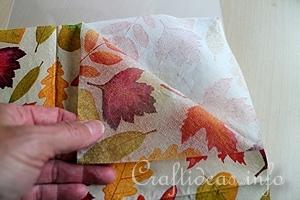
Autumn Glass Cover Tutorial 2
2. Remove the top layer of the napkin. The top layer is the only part of the napkin you will need.
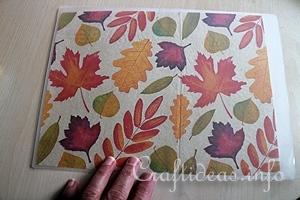
Autumn Glass Cover Tutorial 3
3. Follow the manufacturer’s instructions to the laminating machine. For the machine used for this project, the napkin layer then gets placed inside of the laminating sheet. Press out all of the wrinkles while you can.
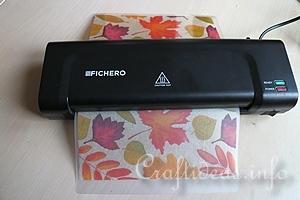
Autumn Glass Cover Tutorial 4
4. Turn on the machine and wait for the signal to begin. With the machine used for this project, the closed side gets then entered into the slot and the machine then pulls the sheet through.
Autumn Glass Cover Tutorial 5
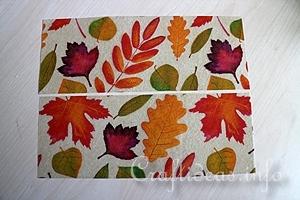
5. Measure your glass circumference and cut the napkin to size plus one centimeter or 1/4 inch overlap in the length. Most likely your napkin will be enough for two glasses such as in this case.
Autumn Glass Cover Tutorial 6
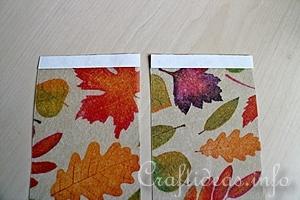
6. Place double-sided sticky tape onto one of the short ends of each of your covers. Pull the protective paper away.
Autumn Glass Cover Tutorial 7
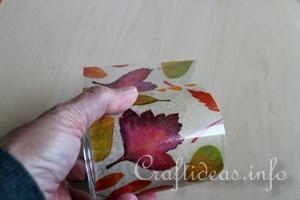
7. Place the non sticky side onto the glass and wrap the cover around the glass. Once you reach the other end, make sure the cover is sitting tight enough around the glass without being too tight (because you will want to be able to remove it again when you no longer need it). It is important to stick the cover to the cover and not the glass.
Autumn Glass Cover Tutorial 8
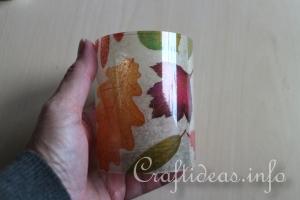
8. The lamination gives the cover a shiny look as if it is glass itself.


*** If you do not have a laminating machine, then you can use a clear one sided sticky foil or contact paper as an alternative. Cut it larger than the size of the napkin piece you are using in case you don’t get the napkin straight on it, it won’t matter. Then remove the protective paper. Place the piece then on the table with the sticky side up and then place the napkin onto the piece with the pretty side up and then gently stick the napkin slowly onto the foil, trying to avoid wrinkles during the process. Cut then the piece to the needed size plus one centimeter or 1/4 inch overlap.

Christmas Tea Light Covers
This cover was made for the Christmas season using the same technique. Find the project here: Reusable Christmas Glass Covers for Tea Lights


More Autumn Craft Themes:

Fall Paper Crafts

Fall Crafts for Kids

Fall Textile Crafts

Fall General Crafts

Fall Wood Crafts

Autumn Season Cards

Halloween Crafts

Thanksgiving Crafts

Leaf Crafts

Pumpkins and Jack o’ Lanterns

Fall Craft Patterns and Templates

A Selection of Autumn General Crafts

DIY Autumn Candles Made From Used Candles

Reusable Autumn Glass Covers for Tea Lights

5-Minute Autumn Decoration

Autumnal Acorn Wreath

Autumn Tea Light Cover


Copyright: Please read this Copyright Information about using the images of this website.


© Craftideas.info

Contact     Links     Privacy Policy and Cookies