|
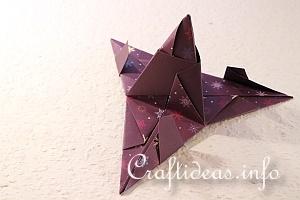
Here you will now build onto the shape you just created on the previous page:
|
|
|
1. This is how the star looked at the end of the previous page. You will now be increasing points for the star.
|
|
|
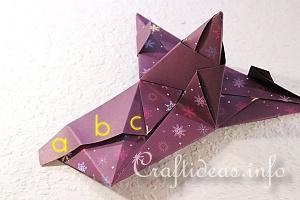
2. Open the bottom of any one of the 3 flat points. This will be the new “base”.
You see the tab (a), the middle or second pocket (b) and the end or third pocket (c).
Each new addition will be repeating the procedure you have learned on this page but will be shown here again.
|
|
|
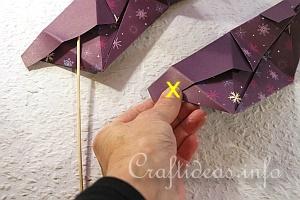
3. Open up the bottom of a new folded paper. Take the tab (”x”)...
|
|
|
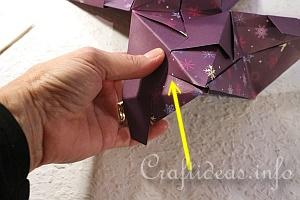
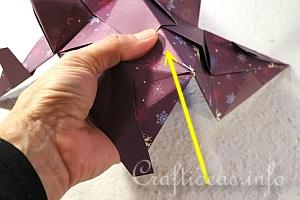
4. ...and slide it into and underneath the second pocket, making sure the folded lines of the side walls are over each other.
|
|
|
5. Open the bottom half of another folded paper. Slide the tab into the third pocket and match the side walls.
|
|
|
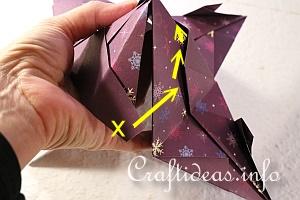
6. Then tuck the tab of the “base” (marked “x”) underneath the vertical pocket of the third side (bottom arrow) and bring the tab then around the corner (top arrow) to close it off.
|
|
|
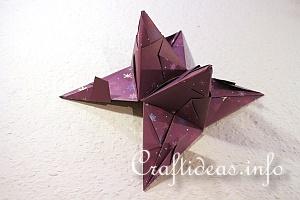
7. Now you have 4 flat points and 2 pyramid shaped points.
|
|
|
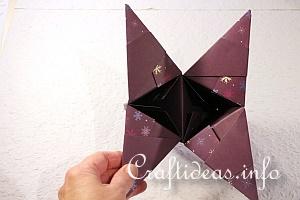
8. This is how the piece looks from underneath.
|
|
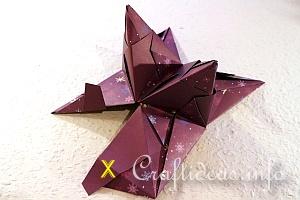
|
9. Now open up any one of the 4 sides like you see in this image. This is your new “base” (marked with “x”).
|
|
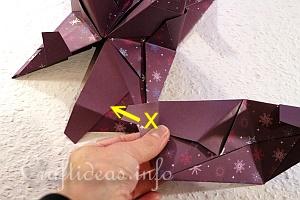
|
10. Open up a new folded paper and slide the tab under the second pocket.
|
|
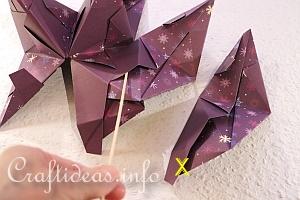
|
11. Then open up the bottom of a third folded paper and slide the tab (marked “x”) it into the third pocket. Here the stick indicates the third pocket.
Then tuck the tab of the “base” underneath the vertical pocket of the third side and bring the tab then around the corner, just like the previous “pyramids”.
|
|
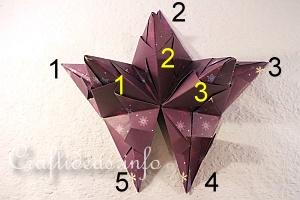
|
12. When done correctly, your star piece now looks like this. It has 5 flat sides (marked black -3 at the top and 2 at the bottom) and 3 “pyramids”(yellow).
|
|
|
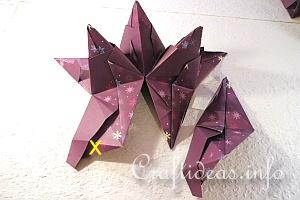
13. Now open up the left side of the 2 bottom flat points (marked “x”). This is your new “base”. Open up the bottom of a new folded paper. You will insert the tab into the second pocket like in the previously made pyramids.
Then open up another folded paper. Insert the tab into the third pocket. Then tuck the tab of the “base” underneath the vertical side pocket of the third side and bring the tab then around the corner just like you did with the previous “pyramids”. Now you have completed another pyramid.
|
|
|
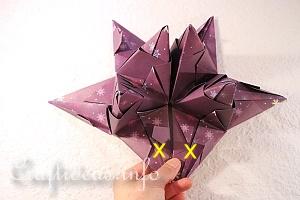
14. Now you have 6 flat points and 4 ”pyramids”.
2 of these flat points are extremely close together. These will now be connected to each other to form a 5th “pyramid” (both marked “x”).
|
|
|
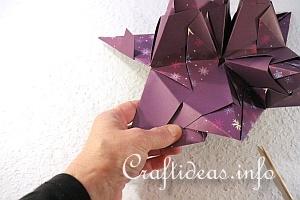
15. To create the 5th pyramid, open both of these two flat points like in previous steps. Then treat the left point as if it is your “base”. The right paper is the second side. Which means the tab of the right paper then gets inserted in the second pocket of the base piece.
|
|
|
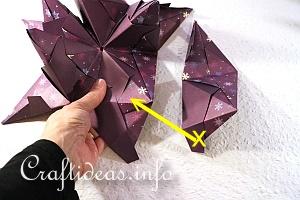
16. Now you will open a folded paper and it will be treated like the third side. Insert the flap of this third paper in the third pocket of the base.
Then take the open tab of the “base” piece (marked “x”) and insert it into the vertical pocket of the third piece and then tuck the tab around the corner to secure it.
|
|
|
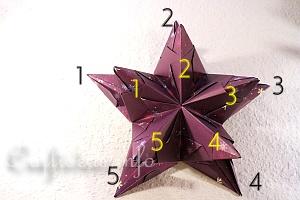
17. When done correctly, your star now looks like this. It has 5 flat points (marked in black) and 5 dimensional pyramid points (marked in yellow).
|
|
|
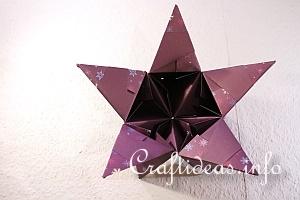
18. When turned over, this is how the star looks like.
|