|
It is highly recommended practicing these steps with 3 scrap sheets of square paper (like origami paper) and repeating this process over and over again until you can make a “pyramid” with ease. That will help tremendously when making the rest of the star.
|
|
|
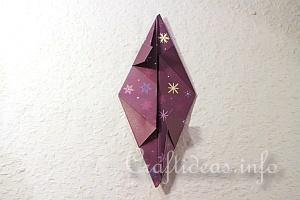
1. Open up your first folded paper triangle so it is then a diamond shape in front of you.
|
|
|
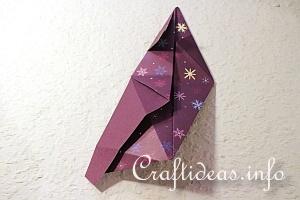
2. Then to do each step of the “pyramid”, you must open up the bottom part of the folded paper piece so it looks like the image to the left. The top half remains closed.
This first piece will be called the “base” throughout the rest of the tutorial. The base will always need to be opened to look like the image to the left. The base is the foundation of each pyramid and always the first side of it.
Two additional sides will always be building upon this base to form a pyramid.
|
|
|
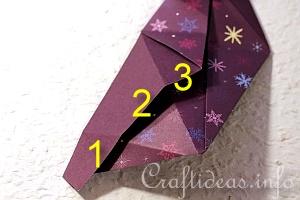
3. This is a close up image of how the “base” piece is set up. The diagram shows how the “base” is divided into 3 sections.
More images will be shown about these sections. This is just a piece of information up front.
The next three images explain more about this particular piece and the importance of it.
|
|
|
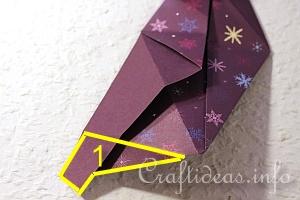
4. This is the first section and will be referred to as the “tab” throughout the tutorial. The tab is the first side of the pyramid point and will always be inserted into other sections as you go along.
|
|
|
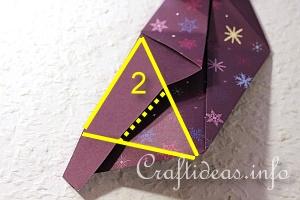
5. This here is the middle section, which is the second side of the “pyramid”.
To build the second side of the pyramid, the tab of the “base” or first side will always be inserted underneath the pocket (indicated by the dotted lines) of this middle section as the second step.
This will be called the second pocket or second side throughout the tutorial.
|
|
|
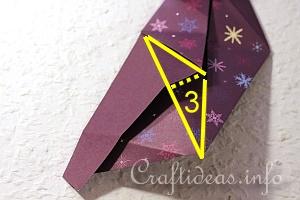
6. This section is the third side of the pyramid. The third step of building the pyramid will always consist that the tab of a new paper will be inserted under the pocket of this section (indicated by the dotted lines).
This will be called the third pocket or third side throughout the tutorial.
|
|
|
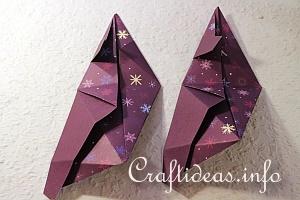
7. Now the first pyramid will be made.
Open up the bottom of a second folded paper. You have two identical looking pieces in front of you.
|
|
|
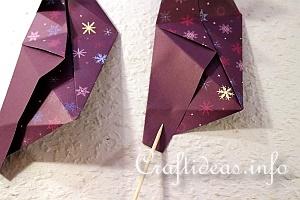
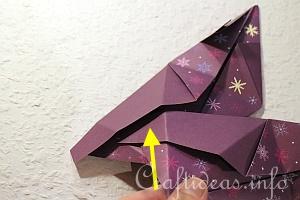
8. You will take the tab of the second folded paper (indicated by the stick)...
|
|
|
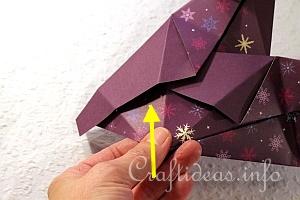
9. ...and insert it under the middle pocket or 2nd section so that the folded lines of the side walls are over each other. Slide the tab in...
|
|
|
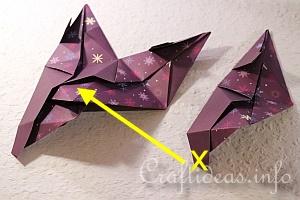
10. ...like this.
Then...
|
|
|
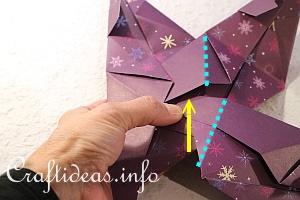
11. ...open up the bottom half of a third folded paper...
|
|
|
12. ...and slide the tab in over second paper and underneath the third pocket so that the folded lines of the side walls are over each other (blue dotted lines).
|
|
|
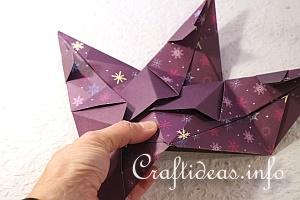
13. It should now look like this image. Each of these 3 pieces are lined up and form the side walls. Now these walls need to “stand”.
|
|
|
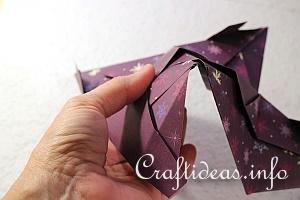
14. Hold up the piece and hold all 3 pieces together...
|
|
|
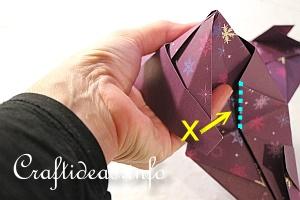
15. Take the tab of the left side (from the “base” and marked “x”) and bring it over towards the right so that it will go underneath the vertical line marked in the image (blue dotted line).
|
|
|
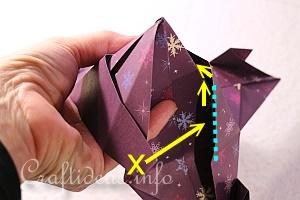
16. Fold back the right vertical looking pocket (marked by the blue vertical dotted line) and bring the tab (marked “x”) underneath it and tuck it around the corner (blue line) to secure it ...
|
|
|
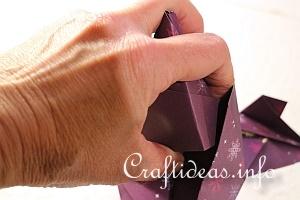
17. ... and close off the pyramid. This causes the pyramid to achieve a 3-D appearance.
|
|
|
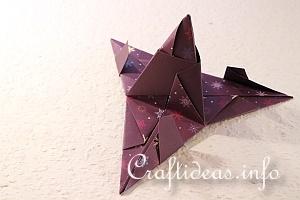
18. When correctly done, this is now how the first “pyramid” should look like. It has one protruding pyramid shaped point in the center and 3 flat points around it.
The rest of the star will be building upon this piece.
|