|
|
Step 1 - The Cuff:
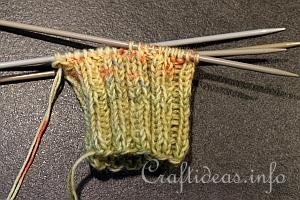
Socks are normally knitted with 5 needles. (Four needles to hold the sock in the round and the 5th needle is the working needle). For this particular pair of socks, 40 (44) stitches were casted on, whereas 10 (11) stitches are on each of the four needles. The cuffs of these socks are then knitted in a ribbing stitch (k2, p2) for 6 centimeters.
|
|
|
|
|
|
Step 2 - The Leg
Then the leg of the sock is knitted for a further 14 centimeters.
The total of the length of the leg including the cuff is 20 centimeters.
20 centimeters leg length is a length you can use for all adult sized socks.
|
|
|
|
|
|
Step 3 - Creating the Backside of the Heel
Now you will “rest” the stitches on the 2nd and 3rd needles. This will later be the instep of the sock. Using a large knitting safety pin will hold the 20 stitches in place.
Now you will only continue with the stitches on the 1st and 4th needle which will be the heel of the sock.
You will now only be working with the 20 stitches on the 1st and 4th needle..
|
|
|
Because the 4th needle was the finish of the previous row, your yarn is now in the middle between needle 4 and needle 1.
|
|
|
Knit the stitches on needle 1 so that your yarn is now on the left side.
You can continue using both needles 1 and 4 or you can place all of the stitches on just one needle for simplicity as was done in this image.
Mark this row to make it easier to count the following rows that you will be knitting afterwards.
Now you will be knitting the heel.
Needles 2 and 3 are still resting during this step.
|
|
|
Turn your work.
For the heel you will continue to knit in a stockinette stitch for 17 rows.
When the 17 rows are completed, the wrong side of the heel is facing you and the yarn is on the left side.
Needles 2 and 3 are still resting during this step.
|
|
|
Turn your work over. This image shows the outside of the knitted heel.
Your working thread is now on the right side.
Needles 2 and 3 are still resting during this step and will continue to rest until it is time to knit the gusset.
|
|
|
|
|
|
Step 4 - Creating the Sole and Turning the Heel
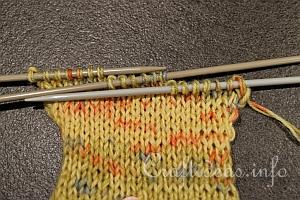
Continue working with the heel stitches on needles 1 and 4. In this step you will now be creating a sole and turning the heel in the direction of the foot. For these socks, there are 20 (22) stitches on the needle. For the turned heel you will divide the stitches evenly onto 3 needles. The two outside needles have to have the same amount of stitches. In this case 7-6-7 (7-8-7). The right needle has 7 stitches, the middle needle 6 (8) stitches and the left needle 7 stitches.
The object now is to decrease all of the stitches on the right and left needle until only the stitches of the middle needle remain.
|
|
|
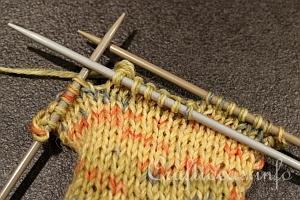
Now you will decrease as follows in the stockinette stitch:
Knit all the stitches on the right needle facing you.
Then knit all but the last stitch on the middle needle facing you.
Then knit the last stitch of the middle needle together with the first stitch of the left needle. This is the first stitch decrease.
As you see in the image for the woman’s sock, the right needle has 7 stitches, the middle needle has 6 stitches and the left needle has 6 stitches on it.
|
|
|
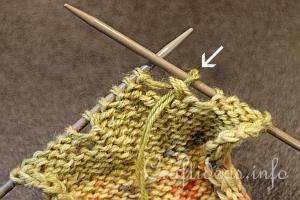
Turn your work.
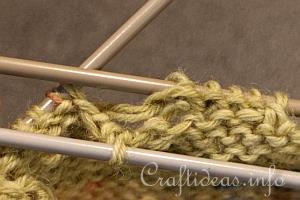
The two stitches you just stitched together to decrease are still on the middle needle. Now just slip the previously decreased stitch from the from the middle needle to the right needle facing you. (see arrow)
|
|
|
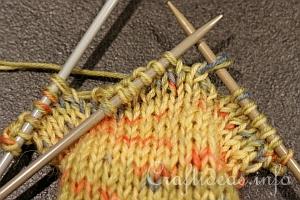
Now you will continue and purl the stitches on the middle needle until you reach the last stitch on the middle needle.
Then purl the last stitch of the middle needle together with the first stitch of the left needle facing you.
This is the next stitch decrease of the heel.
|
|
|
Turn your work again.
Then slip the decreased stitch from the middle needle to the right needle again.
Continue in this manner as written below until only the 6 (8) stitches of the middle needle remain.
|
|
*Knit all but the last stitch on the middle needle facing you.
Then knit the last stitch on the middle needle together with the first stitch of the left needle.
This is the next decrease of the heel.
Turn your work.
The two stitches you just knitted together to decrease are still on the middle needle. Now just slip the previously decreased stitch from the from the middle needle to the right needle facing you.
Now purl the stitches on the middle needle until you reach the last stitch on the middle needle.
Then purl the last stitch of the middle needle together with the first stitch of the left needle facing you.
This is the next decrease of the heel.
Turn again and slip the stitch from the middle needle to the right needle. Then start from * again.
Now you keep repeating until all of the stitches on the outside needles are used up. Just continue knitting or purling the stitches of the middle and decreasing the stitches on each of the outside needles in the same manner until only 6 stitches are remaining on the middle needle.
|
|
|
|
|
|
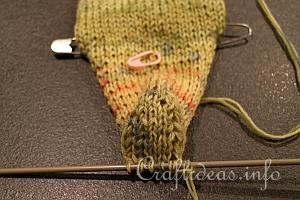
This is how the heel now looks. It is now turned. Now you are ready to knit the gusset and continue with the foot of the sock.
|
|
|
|
|
Continue to Part 2 - Knitting the Socks from the Gusset to the Toe
|