Free Craft Ideas, Tutorials and Templates


CI Border

Home

Patterns

Tutorials

Spring Crafts

Summer Crafts

Fall Crafts

Christmas & Winter Crafts

New Crafts


Elegant Frosted Silver Pinecone Christmas Door Wreath

We are fortunate to have a small pine tree in the yard that discards hundreds of small round pinecones every year. They are all different small sizes and each look too perfect not collect them. It was decided to make a new pinecone wreath for the front door. This one was made to have a frosty look and a touch of silver and sparkle effect was added to it to give it an elegant look to it. Because of the color, it can be left hanging throughout the winter.

It can be hung outside at the front entrance, but the area should preferably be covered so that the wreath will last a long time.


Silver Pinecone Christmas Wreaath

For this project the following supplies were used:

Silver Pinecone Wreath Tutorial 1
- a straw wreath form the size of 30 centimeters or 12 inches
- hot glue gun
- lots of medium and little pine cones (you will need different sizes so that small spaces can also be filled in)
- white spray paint
- silver sparkle spray paint
- 12 little silver glass ball ornaments (remove the hangers)
- 3 tiny silver glass ball ornaments (remove the hangers)
- about 3 feet or about 8 1/2 feet or silver ribbon that is 2.5 centimeters or 1 inch wide (this will be for hanging as well as the
  bow
- small silver ribbons for decorating the bow

Instructions:

Silver Pinecone Wreath Tutorial 2
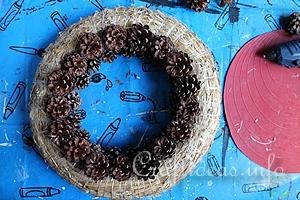
1. Start hot gluing the pine cones on the inside of the wreath.
Silver Pinecone Wreath Tutorial 3
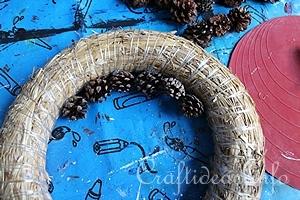
2. The first round is finished.

Silver Pinecone Wreath Tutorial 4
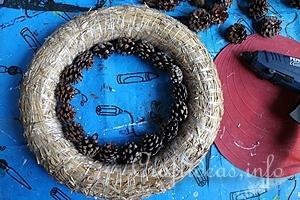
3. Add the next round just above the previous round. Glue the pinecones on so that there is little of the straw wreath to be seen.

Silver Pinecone Wreath Tutorial 5
4. Then add the next row. Occasionally you will notice that you can not avoid all the gaps. This is where the tiniest cones come in handy. Use them as fillers.
Silver Pinecone Wreath Tutorial 6
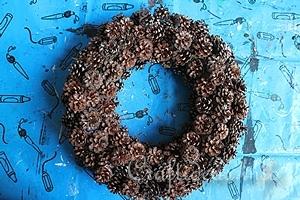
5. Work your way towards the outside of the wreath until it is completely covered.
Silver Pinecone Wreath Tutorial 7
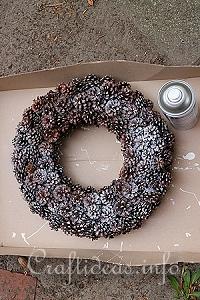
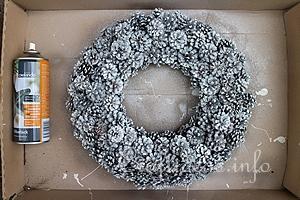
6. The best is to spray paint the wreath outdoors. Here a cardboard box lid was used so that the ground will not get any paint on it. A coat of white was first added. Once dry, a second coat was then added. Make sure to catch all sides of the cones but they do not have to be completely covered in white. They should have more a frosted look.
Silver Pinecone Wreath Tutorial 8
7. Then once the white paint is dry, a silver sparkle spray paint was used to add sparkles on the wreath. Let the wreath dry overnight in a well ventilated place (the basement or wood shed perhaps because of the fumes of the spray).


Silver Pinecone Christmas Wreaath Detail
Add then the ornaments at 4 sides and each of the tiny ornaments get placed in between the clusters of 3. A ribbon was wrapped around the wreath and then knotted for hanging. At the top a ribbon bow was created to add the final touch to the wreath.


More Winter and Christmas Craft Themes:

Christmas and Winter Crafts for Kids

Christmas and Winter Paper Crafts

Christmas and Winter Textile Crafts

Christmas and Winter Wood Crafts

Christmas and Winter General Crafts

Christmas and Winter Greeting Cards

Christmas Tree Ornaments

Christmas and Holiday Wreaths

Christmas Craft Patterns

Santa Claus Crafts

Snowman Crafts

Advent Calendars

Gingerbread Crafts

Christmas Projects.com

A Selection of Christmas and Winter Crafts and Decorations

Merry and Bright Wine Cork Christmas Ornaments

Elegant Frosted Silver Pinecone Christmas Door Wreath

Nostalgic Victorian Style Christmas Ornaments

Standing Scrubby Yarn Snowman Decoration

Peppermint Candy Striped Cone Trees

Scrubby Yarn Christmas Ornament from an Egg Carton

Silver Pinecone Christmas Wreaath


Copyright: Please read this Copyright Information about using the images of this website.


© Craftideas.info

Contact     Links     Privacy Policy and Cookies