|
Instructions:

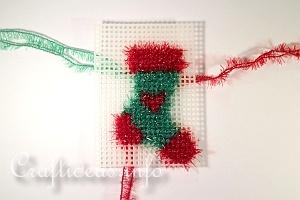
1. Count the horizontal and vertical rows of the pattern and cut out a piece of plastic canvas that is at least 2 squares larger in all directions. Make sure the pattern you are using is centered on the plastic canvas and follow the pattern to create it. Use a doubled piece of scrubby yarn as it is too thin and will not cover the plastic canvas completely.
When an area is finished, you can leave the ends of the yarn hanging as you will need them to finish off the border anyway.

2. When you are finished stitching your ornament, trim down the plastic canvas so that there is a closed straight edge around each row. Then take the same color yarn and stitch around the area next to the area to give a nice clean edge for the figure. Go twice in corner areas to assure that both sides of the corner will be covered with the yarn. Add a red yarn loop to the top to hang him on the tree.

3. This is a closer image of how the cut edges look like. The corners have two sides and that is why you will go through them twice when adding the border. This will give the corners also a nice soft rounded look, too.
|