Free Craft Ideas, Tutorials and Templates


CI Border

Home

Patterns

Tutorials

Spring Crafts

Summer Crafts

Fall Crafts

Christmas & Winter Crafts

New Crafts


Paper Bag Snowflakes

Here in Germany, you can purchase packs of paper bags called “Butterbrottüten”. Translated, these are “Butter Bread Bags”. These are used to pack sandwiches for school and work. Because these are so inexpensive, they are also used a lot for crafting. This pretty snowflake idea is popular in this country. With just 7 of these bags, you can create a snowflake within 10 minutes. When hanging from the ceiling or from a curtain rod, these look so light and dainty.

The amount of bags depends on how intricate you cut your design. For a design with larger holes or longer points, only 7 bags is recommended, or the snowflake will sag through at the bottom when it is hanging. Otherwise a design with smaller holes could work also well with 8 bags. You can experiment what works better for your design. When in doubt about your design, only use 7 bags.


Winter Craft - Paper Bag Snowflakes

For this project you will need:

- a pencil
- a ruler
- white string and tape for hanging
- 7 very thin paper bags, scissors and stick glue
Paper Bag Snowflake Tutorial 1

Instructions:

Paper Bag Snowflake Tutorial 2
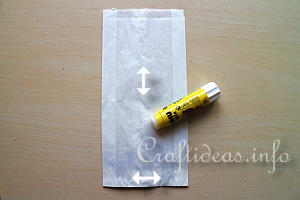
1. First of all, place all of the paper bags in the same direction with the opening at the top. Draw a stick glue line down the middle of the first bag and also across the bottom and place the next bag onto it. Draw a stick glue line again down the middle of the bag and across the bottom.
Paper Bag Snowflake Tutorial 3
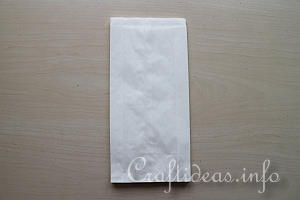
2. Continue in the same manner until first 7 layers of bags are glued together.
Paper Bag Snowflake Tutorial 4
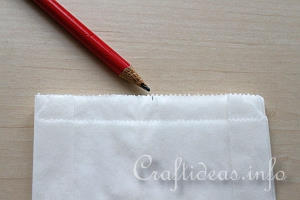
3. Then mark a dot at the top center of the top bag.
Paper Bag Snowflake Tutorial 5
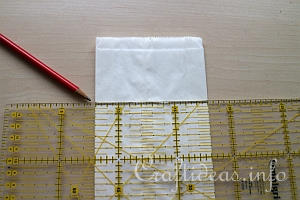
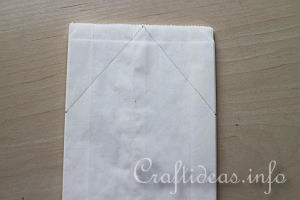
4. Also mark two dots on each bag side at the same height. The further down you place the dots, the steeper the point angle will be.
Paper Bag Snowflake Tutorial 6
5. Draw and connect the top dot with each of the two side dots.
Paper Bag Snowflake Tutorial 7
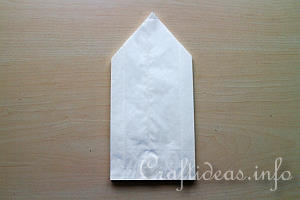
6. Cut these corners away so that your bag now looks like this.
Paper Bag Snowflake Tutorial 8
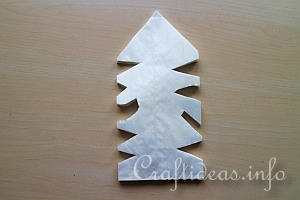
7. On both sides of the bags, cut random shapes through all of the layers.

Paper Bag Snowflake Tutorial 9
8. Then gently pull the bag open until you have the snowflake shape. Glue the first end to the last end by starting at the bottom (center) of the snowflake and pressing the sides together until you reach the top of the snowflake point. Once dry, place a piece of tape at one of the points. This will reinforce the point so it does not tear when the snowflake is hanging. Then poke a small hole through the tape with a needle and pull a piece of string through for hanging.


Paper Bag Snowflake Craft

Paper Bag Snowflake 1

Paper Bag Snowflake 2

Paper Bag Snowflakes
Each snowflake is unique and delicate.

Featured at:

All Free Christmas Crafts

Fave Crafts Button 2


More Winter and Christmas Craft Themes:

Christmas and Winter Crafts for Kids

Christmas and Winter Paper Crafts

Christmas and Winter Textile Crafts

Christmas and Winter Wood Crafts

Christmas and Winter General Crafts

Christmas and Winter Greeting Cards

Christmas Tree Ornaments

Christmas and Holiday Wreaths

Christmas Craft Patterns

Santa Claus Crafts

Snowman Crafts

Advent Calendars

Gingerbread Crafts

Christmas Projects.com


More Christmas and Winter Paper Crafts

3-D Origami Paper Stars

Christmas Star Plant Poke

Scrapbook Paper Snowflake or Star

Origami 3-D Lilac Colored Paper Stars

Dimensional Paper Snowflakes

Dimensional 5-Pointed Stars Using Scrapbook Paper

Country Stars

Woven Paper Christmas Heart Ornaments

Woven Paper Christmas Hearts Mobile

Paper Bag Snowflakes

Paper Bag Snowflake


Copyright: Please read this Copyright Information about using the images of this website.


© Craftideas.info

Contact     Links     Privacy Policy and Cookies