|
Instructions:
Tip: After adding each new piece of paper, cut excess paper away by turning tag over and trimming along the edge.
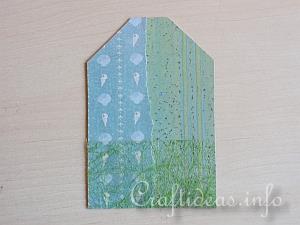
1. Cover the tag with two papers from the pack and also with the fiber ribbon so that it looks something like this:

2. Then create a shaker element. For this you will be cutting out four squares:
a. The first square will be cut out of the paper that will be the bottom of the shaker. For this particular greeting card it was created using a page with the sailboats on it. One of the sailboats becomes the center image of the square.
b. The second square will be cut out of cardboard. Adhere the first square to this cardboard square to give it more stability.
c. The third square will be cut out of acetate foil.
4. The fourth square is the top square or the frame. You will cut it out like a frame so that each of the edges measures about 7 mm or 1/4 inch in width. Glue this frame then onto the acetate foil to create a window.
Continue with assembling the shaker. Turn the top frame side over so that the acetate foil is facing upwards. Adhere thin strips of 3-D foam all along the edge so that it is completely covered and the beads have no chance afterwards to fall out through the sides of the shaker. These strips of foam tape should not be seen from the front, either, when this is turned over again. Then fill the acetate foil area with a few micro beads. To close off the shaker, peel away the protective paper of the foam tape. Adhere the cardboard bottom piece to the foam with the ship side facing downwards. When the complete shake is turned over again, the ship will be facing upwards and can be seen through the window.
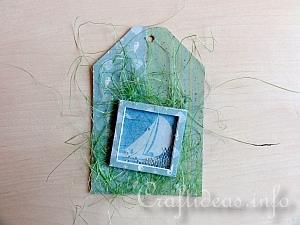
3. Now adhere some fibers and the shaker element to the tag like you see in this image. You can adhere the fibers with a thin layer of glue or double sided clear adhesive tape if you have some. Adhere the shaker box with glue which will also help hold down the fibers on the tag.

4. Create a second mini tag and decorate it as you please. Now punch a hole simultaneously through both the larger tag and the smaller tag and use an eyelet to hold them together.
5. Decorate the larger tag now with the small maritime embellishments and sequins.
6. Tie strands of sisal to the eyelet to create a hanger.
|
Illustrated Tutorial:
|
|

|
Card Making Tutorials: Here you will find information about tools and techniques used to make cards, scrapbooks, artist trading cards and gift tags.
|
|
|