Free Craft Ideas, Tutorials and Templates


CI Border

Home

Patterns

Tutorials

Spring Crafts

Summer Crafts

Fall Crafts

Christmas & Winter Crafts

New Crafts


Fall Craft Idea - Moss Covered Autumn Wreath

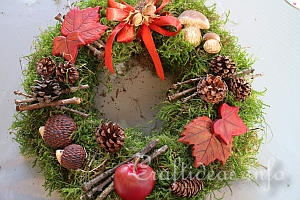
Add a little color of the season to your door or elsewhere outside your home (in an area protected from weather) with a homemade wreath. Most of the embellishments were found outdoors in the garden and plaster of Paris embellishments were added to give the wreath some fall motifs.

Fresh patches green moss from a shady area in the garden was used to cover the wreath. The patches of moss were damp so they were first placed in the sun to dry. Then any excess dirt was shaken off before use. Not everyone has a garden nor mossy areas in their garden so moss can also normally be purchased in a craft supply store. The advantage of purchasing moss is that it is also ready to use.


Autumn Wreath

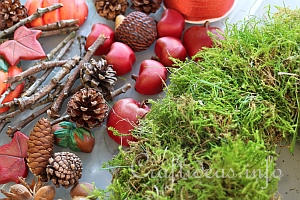
For this project you will need:

- straw wreath, your choice of size
- green florist wire
- moss patches - either fresh moss from the yard that has been first dried in the sun or store bought moss of your choice
- plaster of Paris castings with fall motifs
- small pine cones
- twigs
- any other natural findings from nature such as acorns, chestnuts, etc...
- ribbon, your choice of color (for this wreath a rust colored ribbon was used as the color matched the motifs well)
- hot glue gun

Autumn Wreath Supplies
Because the fresh moss can be quite messy, this project was done outdoors on the terrace.

Instructions:

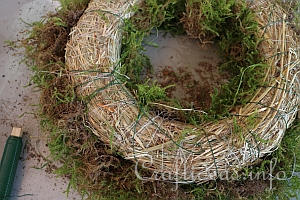
Autumn Wreath Tutorial 1
1. Attach the florist wire to the wreath. Then start placing the patches of moss on the top and sides of the wreath. As each new patch is added, wrap the wire around the wreath once to secure it in place.
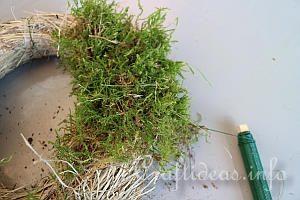
Autumn Wreath Tutorial 2
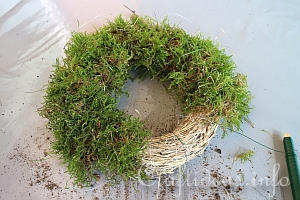
2. Continue adding moss and wrapping the wire around it.
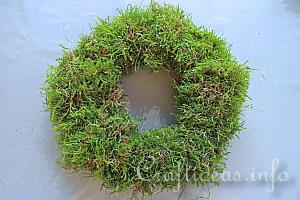
Autumn Wreath Tutorial 3
3. This wreath is now finished.

Autumn Wreath Tutorial 4
4. Cut the wire and wrap the end underneath previously wrapped wires to secure it on the backside of the wreath. Then tuck the end of the wire into the wreath to hold it in place.
Autumn Wreath Tutorial 5
5. Now you can decide how you want to decorate the wreath. First wrap a piece of ribbon to the top of the wreath for hanging. Then add a bow to the front side using the hot glue gun.
Autumn Wreath Tutorial 6
6. First place the embellishments on the wreath to determine where they will be. Once you are satisfied with the look, then hot glue the embellishments in place. Place hot glue on the backside of each item and press it firmly onto the wreath. Check each piece once the glue has dried that it is well attached.

Autumn Wreath Details
Close-up of the embellishments


More Autumn Craft Themes:

Fall Paper Crafts

Fall Crafts for Kids

Fall Textile Crafts

Fall General Crafts

Fall Wood Crafts

Autumn Season Cards

Halloween Crafts

Thanksgiving Crafts

Leaf Crafts

Pumpkins and Jack o’ Lanterns

Fall Craft Patterns and Templates


A Selection of Autumn Crafts

Fall Leaves Picture Frame

Fall Berry Wreath

Tea Lights Centerpiece for the Table

Moss Covered Autumn Wreath

Apples in a Basket Silk Hoop Window Decoration

Fall Pencil Holder

Fall Leaf Stones as Paperweights or Decorations

Scarecrow Table Decoration

Craft Stick Picture with Fall Mushrooms

Window Paints Autumn Decoration

Autumn Wreath


Copyright: Please read this Copyright Information about using the images of this website.


© Craftideas.info

Contact     Links     Privacy Policy and Cookies