Free Craft Ideas, Tutorials and Templates


CI Border

Home

Patterns

Tutorials

Spring Crafts

Summer Crafts

Fall Crafts

Christmas & Winter Crafts

New Crafts


Cheery Birthday or Greeting Card

If you have minimal time, yet want to create a personal birthday card for a special friend or relative, this is the card for you. Once you have created a masterboard, you can cut out ATC shaped cards which can be then used to be the focal point of your greeting card.

Think Happy Thoughts Card

Tutorial - Happy Thoughts Card 3
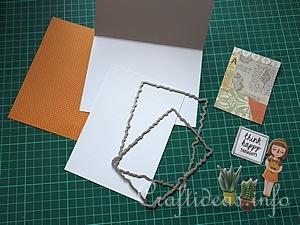
To make a similar card you will need:

- large piece of unwanted sturdy scrapbook paper or other paper of choice to use for the masterboard (here a used brown
  envelope was used)
- small pieces of neutral colored scrap pieces of paper
- ephemera of choice - these here were from Decotime Crafts (a Netherland’s based company)
- folded white card
- scrapbook paper matching colors of your choice of ephemera
- jagged edge dies, 2 assorted sizes (you can use jagged edged scissors if you not have such dies or die cutting machine)
- die cutting machine of choice if available
- 3-D foam tape or 3-D foam pads
- stick glue

Instructions:

Tutorial - Happy Thoughts Card 1
1. First of all, a masterboard was created using scrap pieces of neutral colored paper with minimal patterns. These were adhered in a collage style using stick glue. Take a bone folder if you like to press the paper down firmly on the underground.

Tutorial - Happy Thoughts Card 2
2. Once the glue was dry, the cards were cut out in to a size of 2.5 x 3.5 inches. Each card is unique.

Tutorial - Happy Thoughts Card 4
3. This card was chosen for this greeting card.

Tutorial - Happy Thoughts Card 5
4. The sentiment was first glued onto the top right corner using stick glue.

Tutorial - Happy Thoughts Card 6
5. Then the first element was added using stick glue.

Tutorial - Happy Thoughts Card 7
6. To add a little dimension, the second element was adhered with 3D pads.

Tutorial - Happy Thoughts Card 8
7. The next element was also adhered with 3D pads. This small finished card will now become the focal point of the greeting card.

Tutorial - Happy Thoughts Card 9
8. The 2 jagged edge dies were used to cut out the backgrounds for the focal point.

Tutorial - Happy Thoughts Card 10
9. The larger of the 2 was first adhered to the card towards the left using stick glue.

Tutorial - Happy Thoughts Card 11
10. Then the smaller of the 2 was placed over the first in the opposite direction.

Think Happy Thoughts Card 12
11. The finished card was then adhered to the card.

Illustrated Card Craft Tutorials:

Card Help 75

Tips, Tools and Techniques for Card Crafts and Paper Crafts


Think Happy Thoughts Card 2
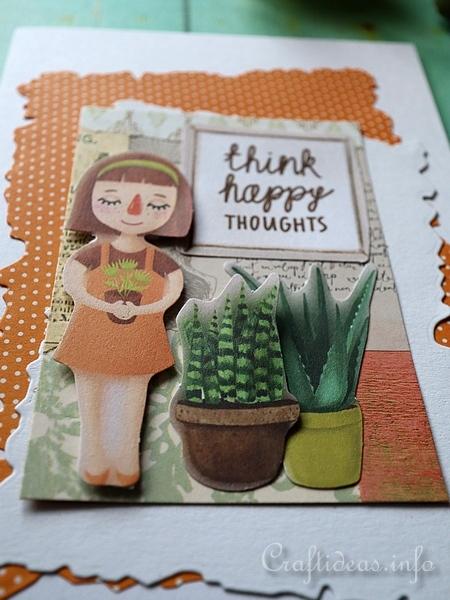
This is a close-up of the card. You can see how the girl and the plant are raised..


A Selection of Summer Greeting Cards and Birthday Cards

Blue Collage Card

Blue Rose Card

Duck Card for Kids

Green Birthday Card

Just Thinking About You Card

Birthday Card in Retro Look

Cheerful Pink Birthday Card

Embossed Card with Butterfly

Cheery Birthday Card

Happy Birthday Card with Stamped Birds

Think Happy Thoughts Card 300


More Craft Themes:

Summer Crafts for Kids

Summer Paper Crafts

Summer General Crafts

Summer Wood Crafts

Summer Textile Crafts

Birthday and Greeting Cards

Patriotic Crafts

Maritime Crafts

Summer Templates, Patterns and Coloring Book Pages


Copyright: Please read this Copyright Information about using the images of this website.


© Craftideas.info

Contact     Links     Privacy Policy and Cookies