Free Craft Ideas, Tutorials and Templates


CI Border

Home

Patterns

Tutorials

Spring Crafts

Summer Crafts

Fall Crafts

Christmas & Winter Crafts

New Crafts


Autumn Leaves Shaker Tag

Shaker tags are fun to create because of what is behind the aperture. You can fill it with anything you like for a special effect.


Fall Leaves Shaker Tags

For this project you will need:

- tag shapes of your choice
- orange textured cardstock
- scrapbook paper matching cardstock
- a piece of cardboard (like a cereal box)
- clear acetate foil
- clear tape
- 3-D foam pads or 3-D foam tape
- assorted micro-beads
- iridescent flakes
- small hole puncher
- decorative matching piece of fiber ribbon
- Cuttlebug machine or die cutting machine of your choice
- Cuttlebug die cut leaves set (set of 4 leaves) or leaf punches/ dies of your choice
- stick glue

Instructions:

1. Adhere your cardstock to the original tag.

2. Glue the scrapbook paper to the cardboard, making sure the printed side of the scrapbook paper is facing upwards. Use the tag and trace the shape onto scrapbook paper and cut out. Set aside until later.

3. Die cut leaf shape out of the bottom third of the orginal tag.

4. Turn the tag over now so that the front is facing the table.
Fall Shaker Tag Tutorial 1
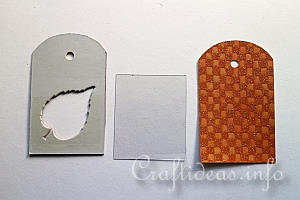
5. Cut a square of acetate large enough to cover the opening and secure this onto the backside of the tag. Here you have the original tag with the cut out leaf (you are seeing the backside of it), the piece of acetate and the backside which is the cardboard covered with the piece of scrapbook paper.
Fall Shaker Tag Tutorial 2
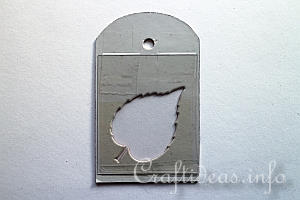
6. Tape the acetate square over the aperture of the original tag.
Fall Shaker Tag Tutorial 3
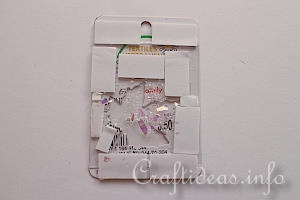
7. Enclose the leaf cut out with 3-D foam pads or cut pieces of 3-D foam tape. This will leave a tub to fill with beads. Make sure there are no openings or gaps between the foam pieces. (Otherwise you will lose the beads). Fill inside area between the foam pads with beads and flakes.

8. Pull of protective papers of the foam tape. Now take the scrapbook paper tag shape you created in step two, line it up over the tag and adhere it now to the backside of the tag with the scrapbook paper side facing down. This will cover the beaded area and enclose them.

9. Turn your tag over and now you can shake the beads.

10. Punch a hole at the top of the tag and insert a piece of decorative fiber for hanging.

Autumn Leaves Shaker Tag


More Autumn Craft Themes:

Fall Paper Crafts

Fall Crafts for Kids

Fall Textile Crafts

Fall General Crafts

Fall Wood Crafts

Autumn Season Cards

Halloween Crafts

Thanksgiving Crafts

Leaf Crafts

Pumpkins and Jack o’ Lanterns

Fall Craft Patterns and Templates


A Selection of Autumn Paper Crafts

Fall Leaves ATC

Autumn Pumpkin Tag

3-D Paper Maple Leaves

Bookmarker with Autumn Motifs

Paper Strip Pumpkin

Autumn Leaf Gift Tag

Autumn Leaves Shaker Tag

Easy Tag with Fall Leaves

Fall Sunflowers Tag

Country Gift Tag with Sunflowers

Autumn Leaves Shaker Tag


Copyright: Please read this Copyright Information about using the images of this website.


© Craftideas.info

Contact     Links     Privacy Policy and Cookies